Welcome to Peggy’s Point! I thought that because this was a smaller build, that I’d be able to finish it more quickly, but as usual, I got bogged down in the details, to the point that it’s another build that has taken me months to complete! However, the Sims 4 Cats & Dogs expansion came out as I was heading for the finish line, and it was fun to work the build into a more pet friendly destination as well as to play with the new tools builders were given (the ability to shrink objects!).
The build was inspired by this home pictured on Pinterest that itself was inspired by the lighthouses of Nova Scotia:

I love the lines and slanting sides and wanted to see if I could work up something similar in The Sims 4. I decided to make it a larger home but still with the same basic structure when viewed from the front. I wanted to create softer landscaping that would blend into an existing beach lot in the game. I had hoped to use one of the new Brindleton Bay lots, but for the size of the home and the immediate scenery I wanted, the island in Windenburg (from the Get Together expansion) worked out much better.

In the front of the home, on the left, you’ll see a small pond with chairs placed nearby to allow sims to relax and chat while they check out the pond or the beach beyond it.

To the right of the house is an outdoor sofa positioned for a great view of the ocean and romantic natural touches for a bit of privacy.

As it turns out, this particular sofa is currently bugged. Even though it is a 3 tile sofa, it will only seat 2 sims (see issue here), which was a bit of a bummer, but shouldn’t inhibit most romantic situations (have the kids go hang out by the pond!).
Heading around to the back of the house, here is a daytime shot:

I decided to try my hand at setting up a firepit by shrinking some of the ruins objects from the Get Together expansion pack. Here’s a closer look at it at night:

There is also a small outdoor bar.

And a hot tub.

I was surprised to discover that Sims 4 Cats & Dogs did not include any dog or cat houses for the exterior, so I took a shot at creating one.

My tester dog seemed to approve!
Moving on to the interior, I went with a nautical theme for the styling. The ground floor is open concept and includes kitchen/dining/living. Entrance:

Dining nook:

The galley style kitchen stretches along most of the left wall (from the entrance), and the living is tucked underneath the stairs:

Here’s the living room from the opposite side, showing the fireplace and study area:

Facing the exit, you’ll find the cute new fish tank from Sims 4 Cats & Dogs on the right, a mini-bar on the left, and fun decoration along the top walls:

Heading up to the second floor, you’ll find a full bathroom (shown from above due to the high walls and tight spaces making it difficult to get a good camera perspective):

There is also a master bedroom with its own fireplace:


As you can see, the bedroom is open but still with a sense of privacy as sims need to navigate around to it from the stairs. There are small nooks along the way, one with a keyboard, one with a dresser, etc. You can see there’s a great spot setup for Kitty tucked underneath the stairs. Kitty also has her very own private little bathroom:

Moving up to the third floor, I decided to set it up as a game room with a TV nook, but it could be easily converted to provide a second bed/bath instead. Here are a couple shots of it as-is:


As I mentioned, it’s tough to get good pictures of some of the interior spaces because they’re relatively small, and I don’t like the distortion from having to zoom out, so the following overhead shots are likely to give you a better idea of the complete spaces.
3rd Floor:

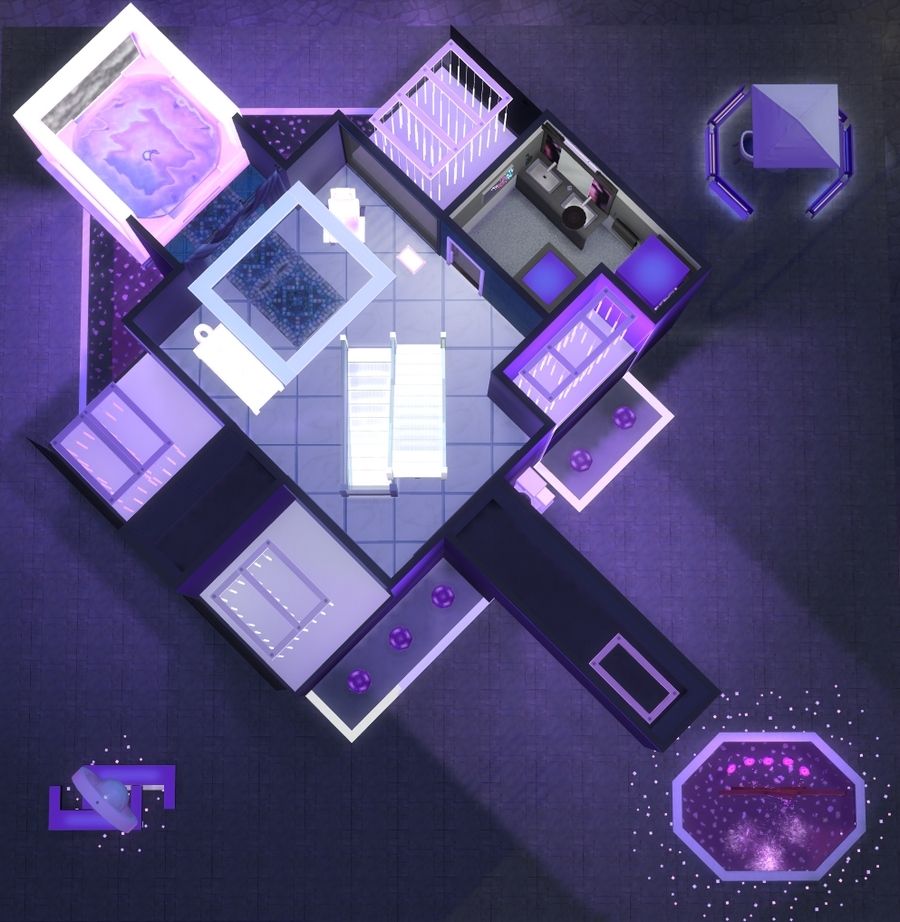
2nd Floor:

1st Floor:

Here’s an overhead shot of the structure with roofs up:

And that’s it for this one; one advantage of going smaller is it doesn’t take nearly as long to do these write-ups! I’ll leave you with a more distant shot of the house as it sits on the island. I think it looks cute!

Peggy’s Point costs $171,524, and is situated on a 30×20 lot (I used Dock Den in Windenburg). It has been thoroughly play tested, and the only issue I’m aware of besides the outdoor sofa bug I mentioned is that sims cannot dance to the stereo on the 3rd floor because the area isn’t large enough.
If you’re interested in taking a look at Peggy’s Point in game, click here to download the build from the online Gallery. Or, if you prefer, you can search for it in the game Gallery by its name, or by my hashtag, #bryscreations. Please be sure to place the home in build mode, so that lighting colors and intensities are preserved. Enjoy!